
As many of my friends and family can tell you, I like leaves – and maple leaves are some of my favorites. When I saw the Maple Leaf shawl pattern from Elfmoda, I knew I had to make one.
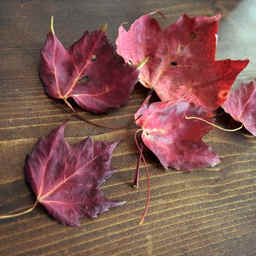
Maples are some of the brightest trees in the woods come fall, and the ones with gold veins through scarlet leaves are the most striking to me. That one at the bottom left would be my inspiration. However, the shawl is knit back and forth across the leaf blade. Using colored yarn, I would have to change to gold just for the veins several times across every row (and deal with the resulting thousands of loose ends to weave). No thanks! Custom dyeing the yarn would be a much better idea – although it would have to be dyed after the shawl was knit, and any mistakes would mean hours and hours of work for nothing. A bit of a risk; but I’m not the first to make this shawl and dye it afterwards, so I was able to read up on others’ work first and I thought I stood a good chance.
I began by spinning up a blend of wool, silk, and bamboo to a size a bit between laceweight and a light fingering weight. The silk and bamboo gave this yarn a strength and sheen that I hoped would take color well and give my stitches definition. It was tedious spinning up so much white and would be more tedious to knit such a pattern all in white, which is why I posted so rarely about it. It didn’t seem to ever change.

Spinning yards and yards of white
I spun as finely and as evenly as I could. I’ve come a long way from the yarn I used for the ruana, though I was hoping that all that stonewash yarn would help me make this a little finer and not quite so lumpy. Still, such a natural looking pattern was perfect for homespun, as little inconsistencies would just give the leaf a bit more texture. Hopefully plying two or maybe three strands of it together would even it out so a little ‘variations in texture’ wouldn’t end up structurally unsound.

The finished yarn - still far from a leaf
Not the most consistent of yarns, but after hours on the wheel, it was done. I had a bit more than eight hundred yards; I could only hope that it would be enough for the pattern. I spun two strands of this yarn together to make it two-ply, which makes nice open holes when it comes to knitting lace. There wasn’t enough yardage for three-ply, so that choice at least was out of my hands. It would be a light, early autumn shawl.

Starting to knit
This shawl starts from the center of the leaf base where the stem would attach and is worked in rows outwards to the points. It wasn’t a difficult pattern, though each row was different and it did require a bit of care and attention. Fortunately it was easy to see if there was a mistake, because anything that threw off the count of stitches would be very apparent when the next leaf vein looked crooked. It did feel a bit strange knitting a white leaf, and the further I got, the more worried I was about dyeing it afterwards.

A ghostly leaf
The finished leaf was soft, and the uneven yarn gave it a bit of a cloudy appearance. There was nothing for it now but to begin preparations for dyeing, and figure out just how to get the colors where I wanted them. The first color would be the easiest – turning the entire leaf from white to yellow. That would give me the veins and brighten the reds between them. So the leaf went in the dyepot just the way it came off the needles, and I didn’t have to worry about any sort of patterns just yet.

From white to yellow
I used Jacquard Acid Dyes for this project, and Brilliant Yellow definitely came out a brilliant yellow. Acid dyes might sound scary, but you’ve likely used them yourself before – to dye Easter Eggs, or tint frosting, perhaps. They’re called acid dyes because a bit of vinegar in the dyepot helps to cause the reaction that binds the colors to the fiber. So now I had a big, bright yellow leaf, and the next stage of the process would show whether my idea would work or fail.
I needed a way to stop the red dye from getting to the leaf veins in a natural way, so I took cotton yarn and ran it through the stitches of the veins, so that I could draw it up tight and block the dye from getting to them. Using something to block the dye in this manner is called a physical resist – it physically couldn’t get there, so those areas (hopefully) would stay yellow while the large open areas would be scarlet. Just like rubber bands around a t-shirt for tie-dye, really. I stitched the cotton yarn through and drew it up tight. I didn’t take any pictures, because it was just a yellow and white ball, but put it back into the dyepot with Fire Engine Red. After the dye took up – and from what I could see, the solid areas were now a brilliant scarlet – I pulled the shawl from the dyebath and started to unpick my cotton yarn to see my shawl. I worried that the dye might have penetrated the gathered areas, but it turned out that my fears were misplaced.

The cotton yarn, pulled up tightly, had done a fantastic job of keeping the red out – almost too well! In starting to unpick it I realized how delicate my handspun was and how tightly it had been drawn up. I feared for the worst – if I snapped a thread, I would really be up the creek, since the little leftover yarn I had was still white and would have to be dyed to match (a feat that would range from difficult to near impossible depending on where it broke, and of course, the most complex areas were where it was most likely to break). Finally, with all the tension of a high-stakes poker match, the shawl was completely opened up.
I have to admit, I wasn’t very impressed. It was garishly bright and patchy at parts. At this point the yarn had been dyed brightly twice, and may not take up much more dye in a third bath. Was it a waste? Should I even try to mute it or blend the edges? Tyler thought it was worth a go. And honestly, it couldn’t get much worse in my opinion. So I mixed up a third dyebath – this time more of the red as well as a good dose of Teddy Bear Brown, to hopefully tone down the eye-watering brightness. I hoped that the blend of colors would give me a more coppery tone, and wanted to concentrate it at the tips of the leaves (but still get a light even overlay over everything).
Instead of putting cotton yarn through every vein again, I opted for a looser resist – folding the leaf into sections with all the veins together, and loosely putting one thread through them, like a closed fan. Then I rigged up a broomstick over the dyepot with the shawl wrapped around it (again no pictures, because it was a quite a jury-rigged affair) in order to slowly lower the shawl in, a little at a time. The tips entered the dyepot, and the dye started to strike. Every few minutes I lowered the shawl a little more. This would keep most of the dye concentrated at the ends and hopefully leave just enough to tone down the body of the shawl. Leaves are usually darkest at the tips, and the ruddy brown looked promising. Almost as soon as the whole shawl was in it was time to fish it out and give it a good rinse and see if this last-ditch attempt had worked. After three turns through the dyepot, it would be very unlikely that a fourth attempt would work at all. There are only so many sites along a wool fiber that dye can attach to, and they were nearly all filled already, it seemed.

Fortunately, the coppery dyebath was just what this shawl needed to tone down the colors into something more natural. It didn’t take up very much, but what it did brought rich color into the red and muted the yellow into something more akin to a real leaf – darker at the tips and still very bright at the base. It blended the edges of the red and yellow together, too. Phew! This one had me really nervous, but in the end came out just the way I had hoped. Blocking it stretched all the points into sharp definition, and it was ready to be sent off to be judged at the Big E.

I was really nervous sending it away to be judged; the only spinners that had ever seen my handspun up close are those that I’ve taught myself, so to have professionals looking it over was very intimidating. Surprisingly enough the judges were impressed too, and this shawl netted me Grand Champion of the spinning competition! I can’t help but feel it was more for the dyeing than for the spinning, but I’m glad either way. It will be a tough thing to top for next year – but I’ve got some ideas. Until then, I’ll be wrapping up warm in my great big leaf.

3 comments
Thanks guys! It was well worth the risk, even if it did seem dicey for a bit. I’d love to use this same dye technique with other projects, but I’ll need to find just the right one. Lately I’ve been focusing on an entirely different sort of dyeing . . . but you’ll hear more about that later ;)
What a glorious shawl! It couldn’t be more perfect!
Beautiful work. I live seeing your creations. Congrats on Grand Champion. Well deserved